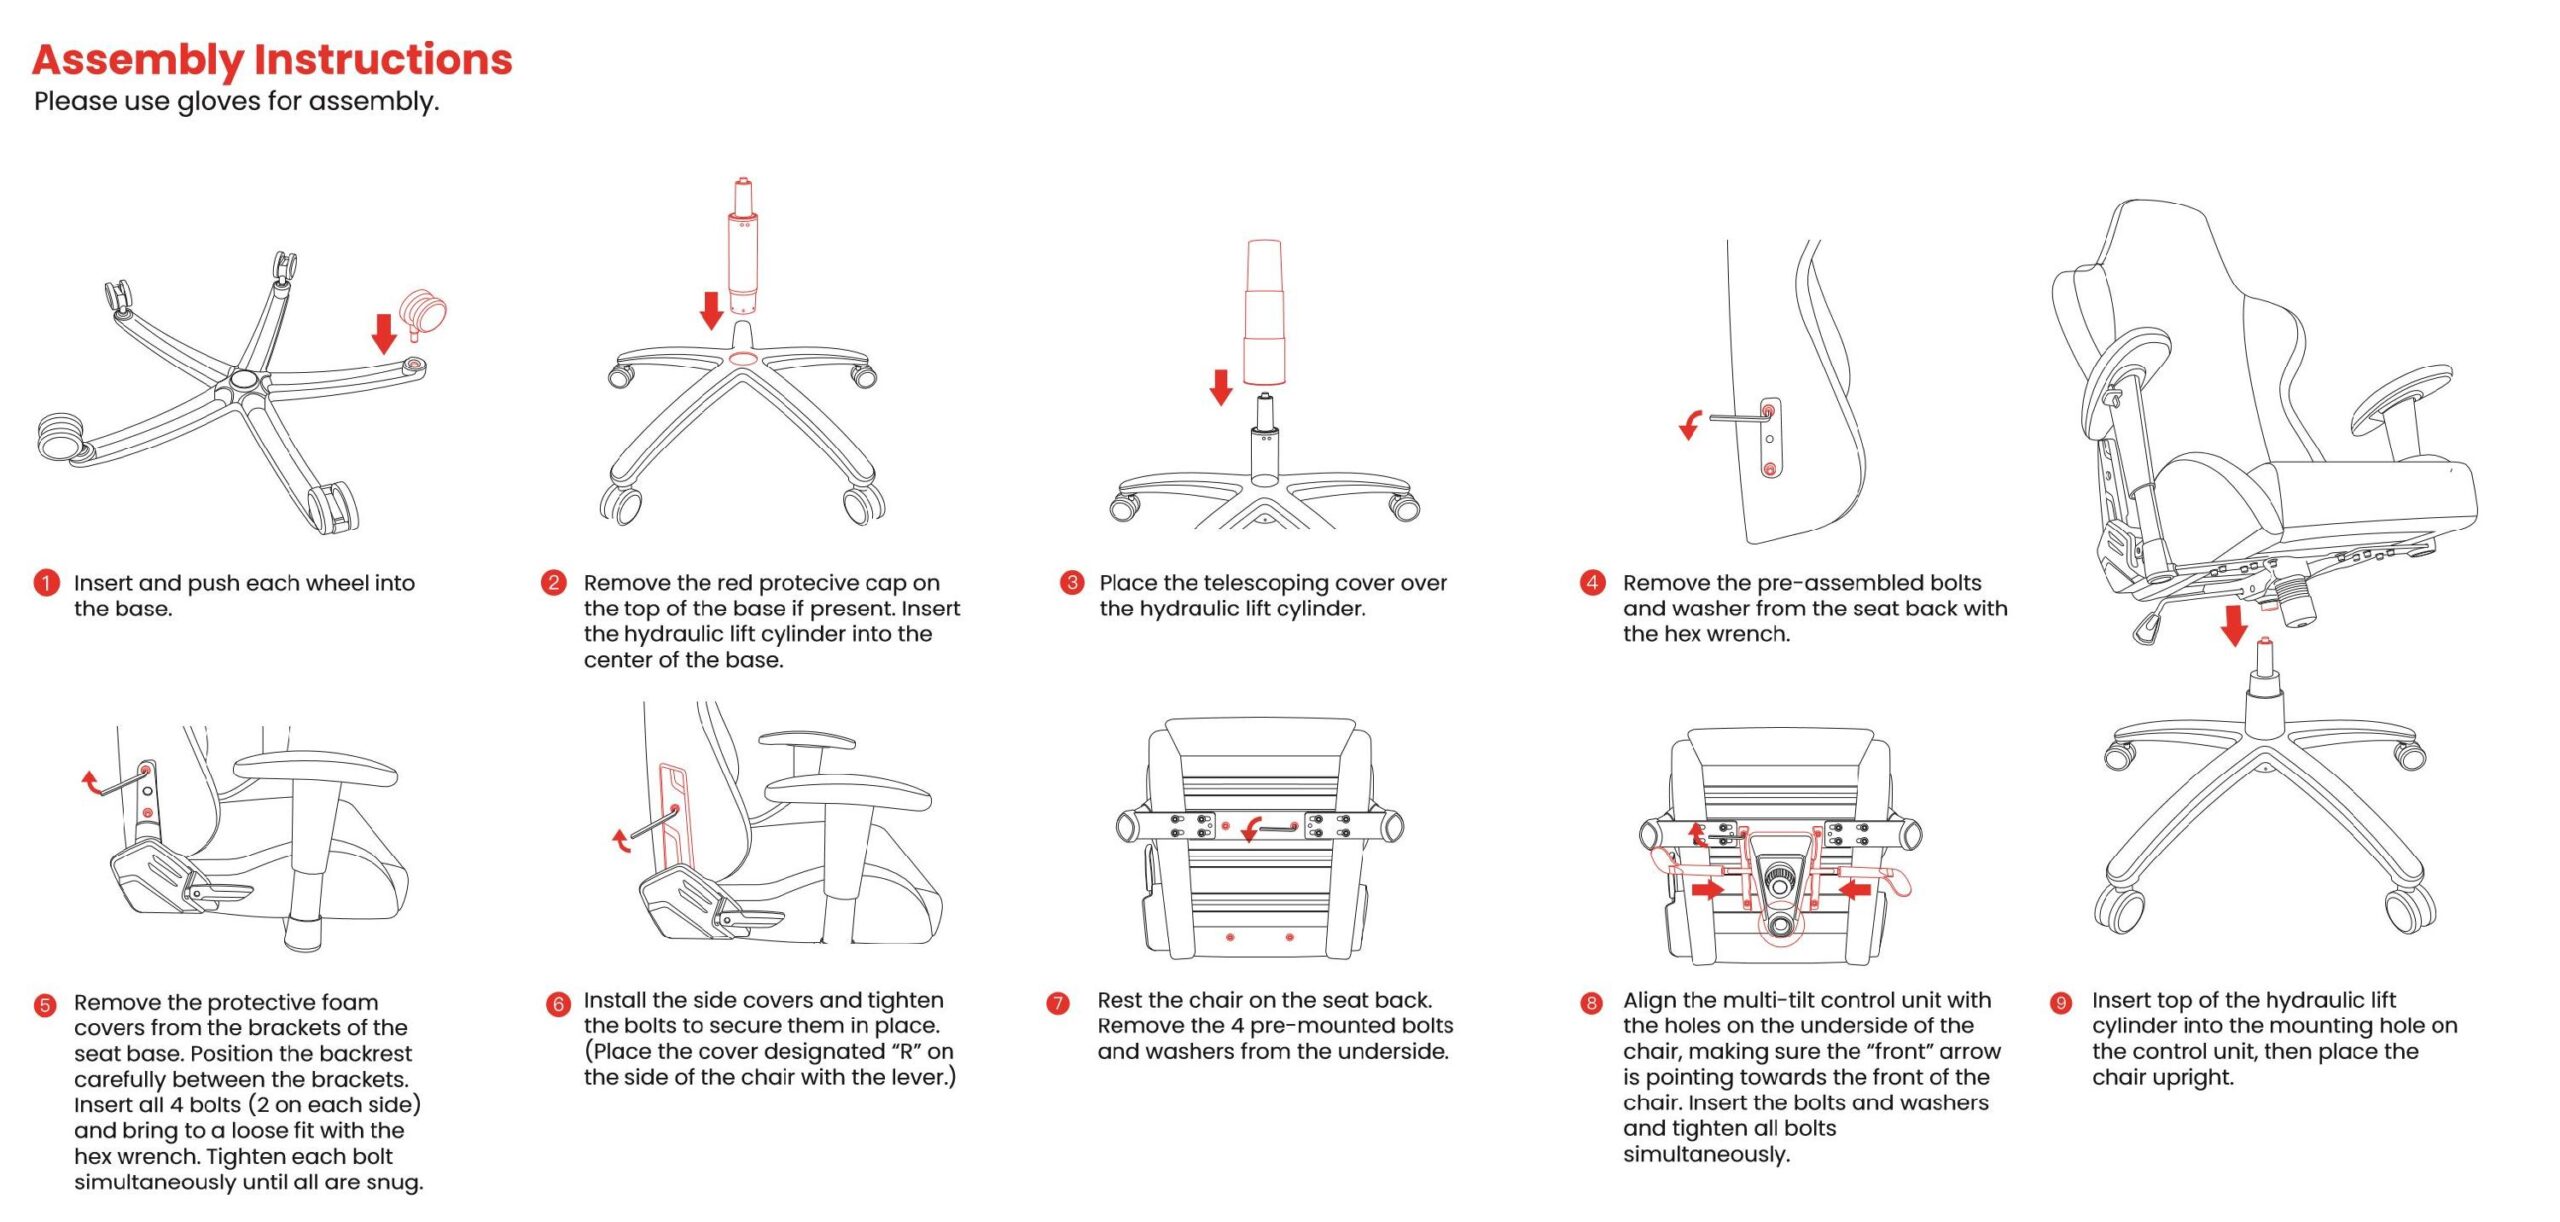
Assembling a gaming chair can be a straightforward process if you follow the right steps. We will guide you through the process, from unboxing to completion.
Step 1: Unbox the Chair
Start by carefully unboxing the gaming chair and laying out all the components to ensure that everything is included. Verify the parts using the instruction manual.
Step 2: Base and Wheels
Attach the wheels to the base of the chair by firmly pressing them into the designated slots. Make sure they are secure and can rotate freely.
Step 3: Seat and Backrest
Place the seat upside-down on a soft surface to avoid damaging it. Align the backrest with the seat and use the provided screws to attach them together securely.

Credit: www.techpowerup.com
Step 4: Armrests and Supports
Attach the armrests to the seat by aligning them with the designated slots and securing them with the provided screws. Next, connect the supports to the base and seat of the chair.
Step 5: Gas Lift Cylinder
Insert the gas lift cylinder into the center of the base, making sure it is properly aligned and secured. This will allow the chair to adjust its height.
Step 6: Cover Installation
Gently slide the cover over the top of the gas lift cylinder, ensuring it fits snugly. Then, zip or fasten the cover securely to the backrest and seat.
Step 7: Final Adjustments
Double-check all the screws and connections to ensure they are tight and secure. Adjust the height of the chair using the gas lift cylinder to your preferred level.

Credit: help.maingear.com
Step 8: Enjoy Your Chair
Once everything is assembled and verified, your gaming chair is ready to use. Sit back, relax, and enjoy your gaming experience in comfort and style.
Conclusion
Assembling a gaming chair can be an enjoyable and rewarding experience. Whether you’re a gaming enthusiast or need a comfortable chair for long hours at your desk, following the steps mentioned above will ensure that your gaming chair is assembled correctly and ready for use.
I believe this internet site has very great composed written content posts.